


Installing aGalaxy Software on VMware Hypervisor
This chapter shows how to install the aGalaxy Virtual Appliance (VA) software on a VMware hypervisor. The process of installing the aGalaxy software on a physical hardware device is almost the same as the process for installing the software on a VMware hypervisor.
NOTE: If you are installing the aGalaxy software on a hardware device, please skip to Installing Software on VM or Hardware .
The following sections describe how to prepare the system for installation, and how to use the installation program. After you complete installation, you will be ready to access the
Launching the vSphere Client and Creating a New VM
1. Contact A10 Networks to obtain the .iso file, and save the .iso image on your desktop or other location where you will be able to find it.
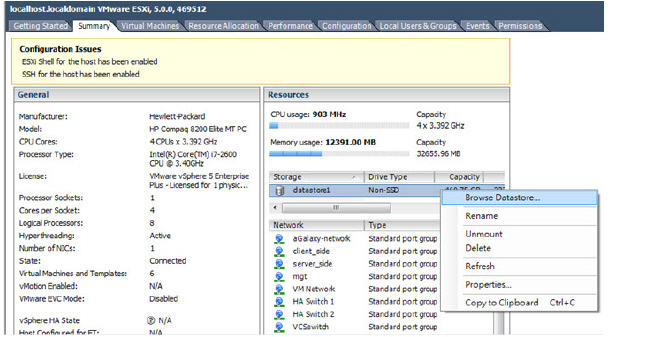
2. Launch the vSphere Client, and at the Summary tab, right-click datastore1 and select Browse Datastore.
FIGURE 10 Launch the vSphere Client
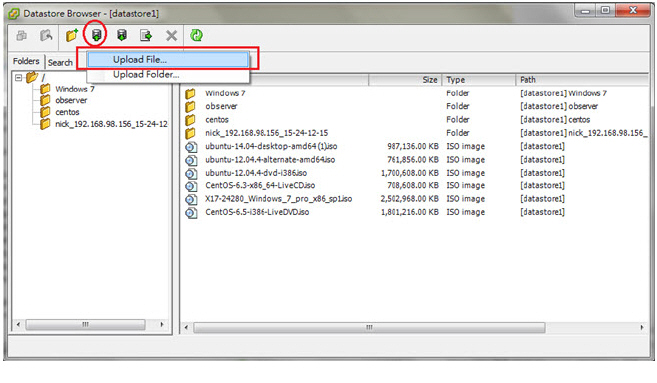
3. Click the Upload icon and select Upload File.
FIGURE 11 Click the upload icon
4. Navigate to the aGalaxy .iso file that you received from your A10 Networks sales representative.
The file should be called something similar to “aGalaxy.iso”. Select the file and then click Upload.
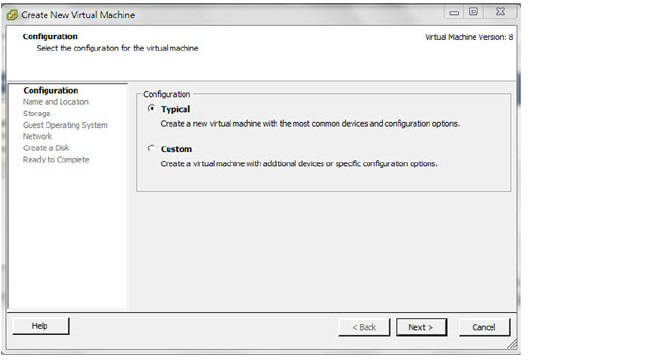
5. Select File > New > Virtual Machine.
FIGURE 12 Creating a new VM

6. Select the Typical radio button and then click Next.
FIGURE 13 Choosing the VM configuration
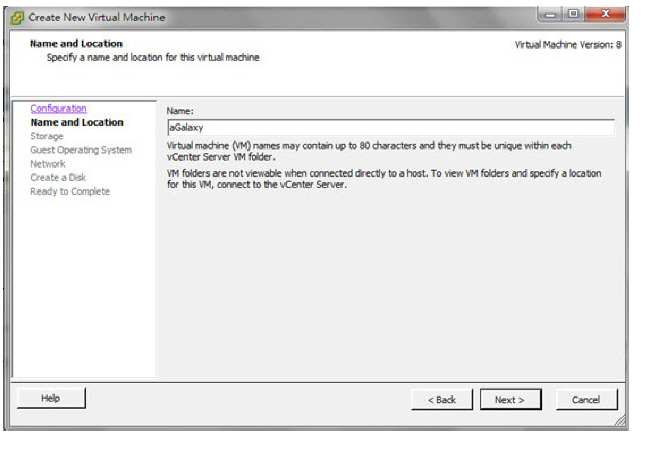
7. Change the name of this virtual machine instance (for example, to “aGalaxy” in this example, or another desired name), and then click Next.
FIGURE 14 Naming the VM instance
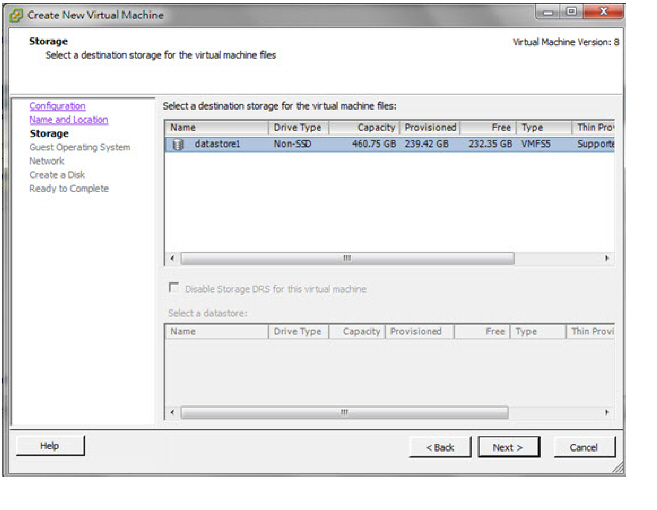
8. Select a destination storage for the new virtual machine, and then click Next.
FIGURE 15 Selecting the datastore1 location
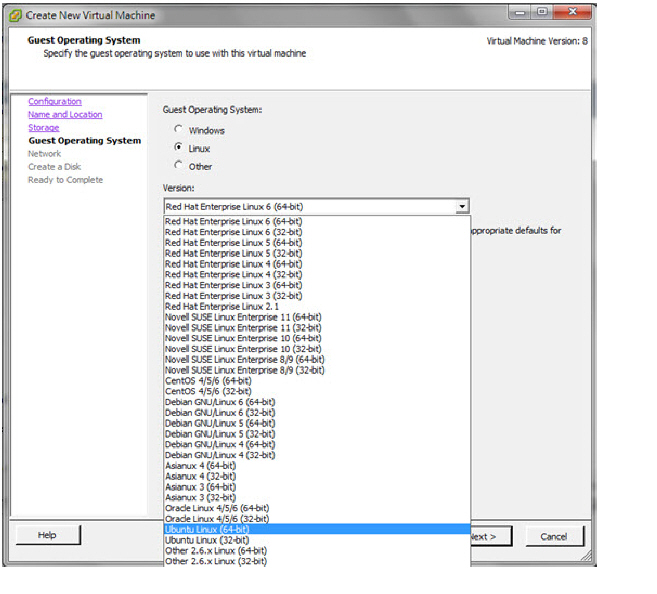
9. Select Ubuntu Linux (64-bit), and click Next.
FIGURE 16 Selecting the Guest Operating System
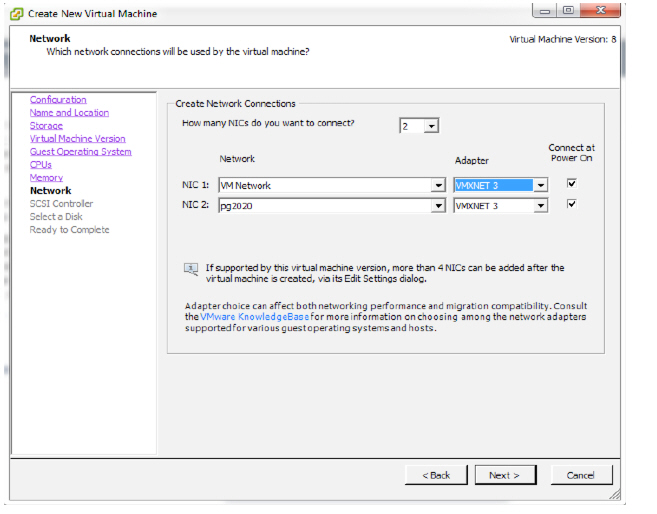
10.Choose your network connections. From the How many NICs do you want to connect? drop-down list, select the number of interfaces you wish to add. From the Adapter drop-down list, select VMXNet 3. The Connect at power On checkbox is selected by default. Click Next.
FIGURE 17 Set up the Network Connection
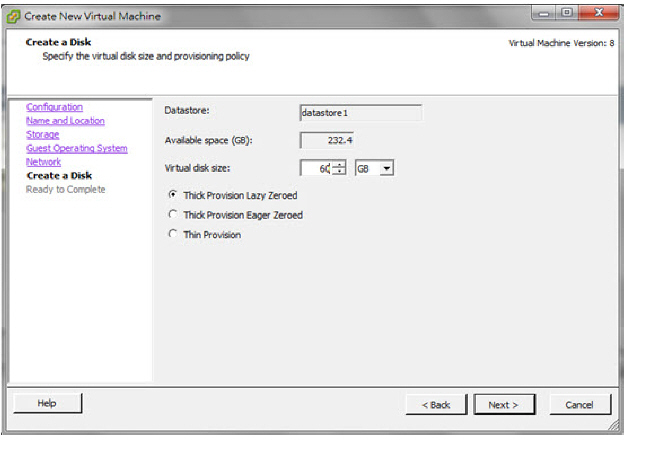
11.Make sure the datastore has at least 800 GB of free space as a minimal requirement for aGalaxy.
Then, select the Thick Provision Lazy Zeroed radio button and click Next.
FIGURE 18 Specifying the virtual disk size
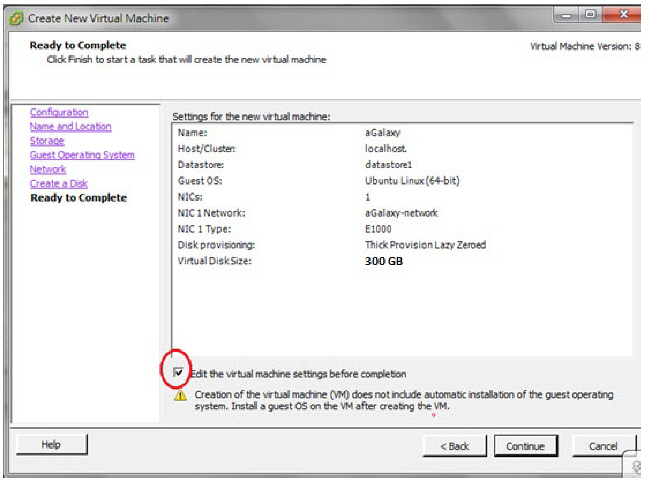
12.Select the “Edit the virtual machine setting before completion” checkbox, and click Continue.
FIGURE 19 Finish the process of creating the VM instance
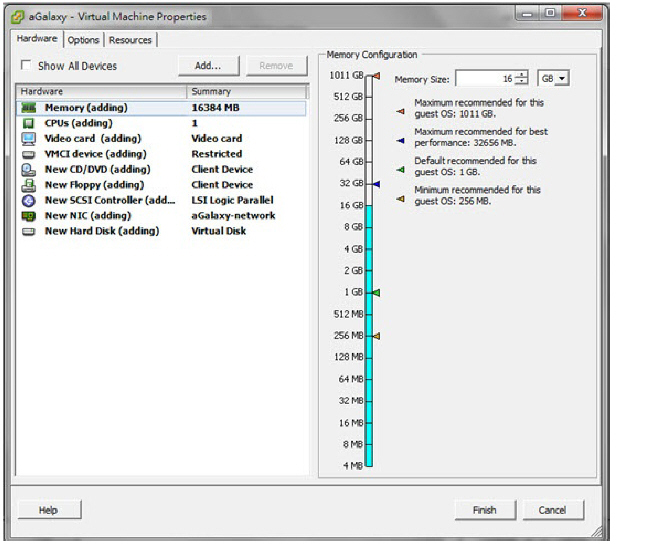
13.View the Hardware Memory Configuration. Note that 16GB memory is the minimum requirement to install aGalaxy.
FIGURE 20 Memory Configuration must be at least 16 GB
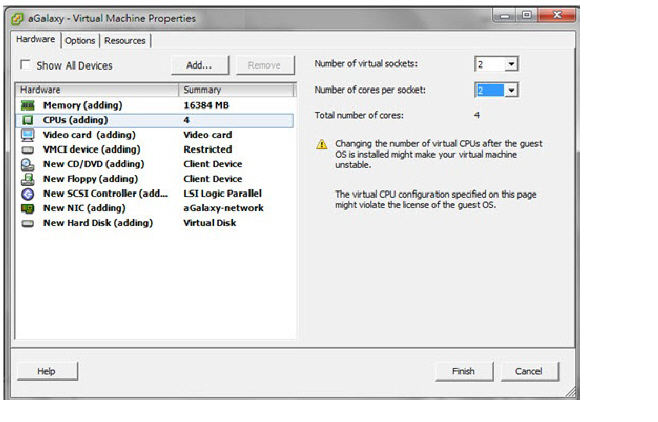
14.For the number of CPU cores, specify 4 cores (or higher).
FIGURE 21 Select the number of CPU cores
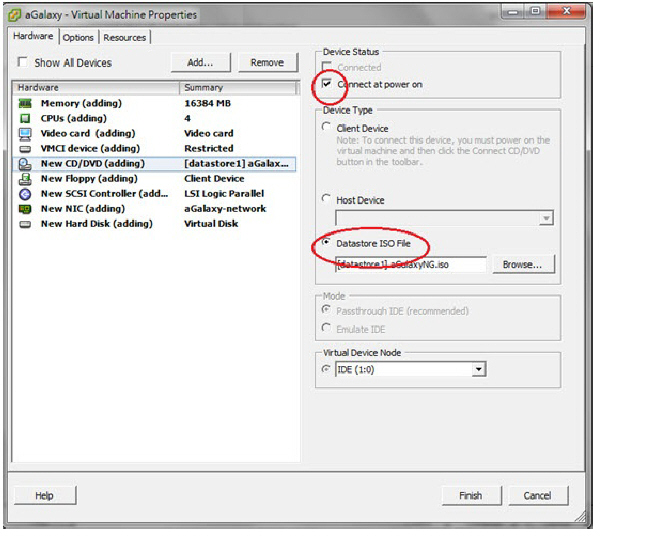
15.Click the “New CD/DVD (adding)” tab and configure the following:
• Select the “Connect at power on” checkbox
• Select the “Datastore ISO File” checkbox
• Select the .iso file you uploaded in the section “Launching the vSphere Client and Creating a New VM” to the datastore.
• Click “Finish”
FIGURE 22 Configuring “New CD/DVD (adding)” tab options
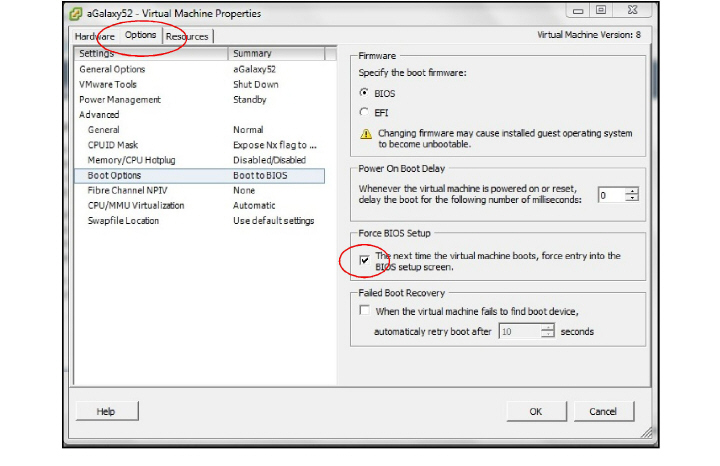
16.Select the Options tab > Boot Options, and then in the Force BIOS Setup section of the window, select the checkbox “The next time the virtual machine boots, force entry into the BIOS setup screen”.
FIGURE 23 Enable Force entry into BIOS setup screen
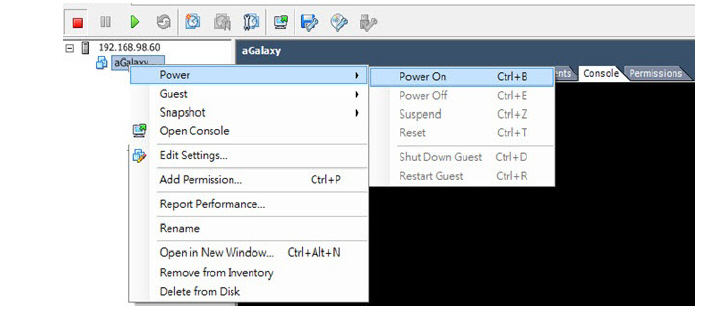
17.Right-click the new aGalaxy VA (virtual appliance) instance that appears in the left pane of the hypervisor, and select Power > Power On.
FIGURE 24 Powering on the new aGalaxy instance
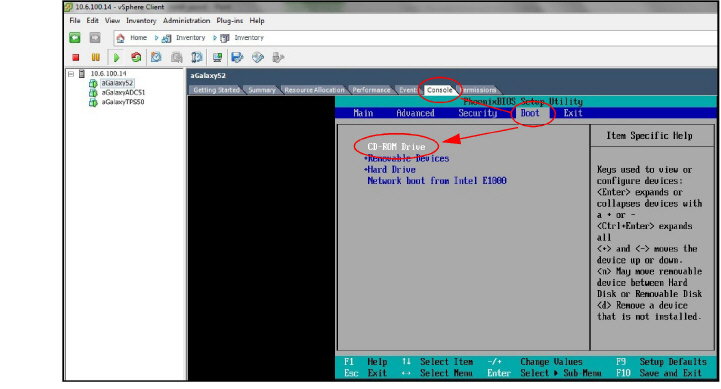
18.From the BIOS Setup Utility, select the console tab, and then Select CD-ROM as the first boot device.
FIGURE 25 Setting CD-ROM drive as first boot device
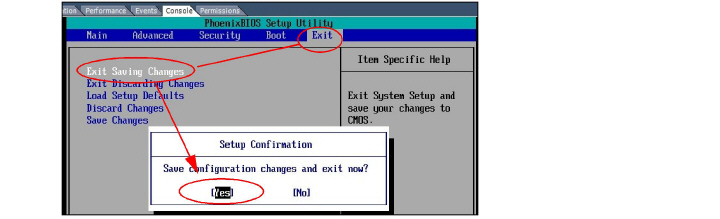
19.From the console tab, select the Exit tab and then select Exit Saving Changes.
FIGURE 26 Exit console with Saving changes
Installing Software on VM or Hardware
1. Select the Console tab to view aGalaxy's boot progress, and press the <ENTER> key to begin the installing process.
FIGURE 27 Initialize the installation process
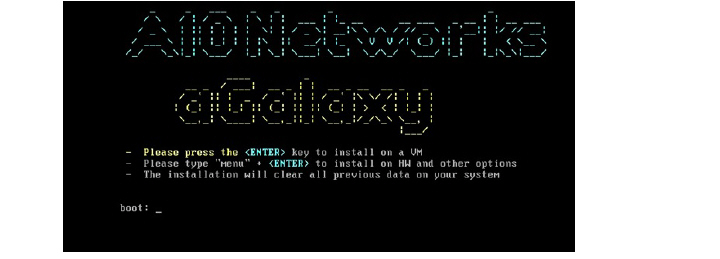
2. Press the <ENTER> key to begin the installing process. If you are installing the aGalaxy software on a hardware model, type “menu” to access the Advanced menu.
FIGURE 28 Advanced menu options
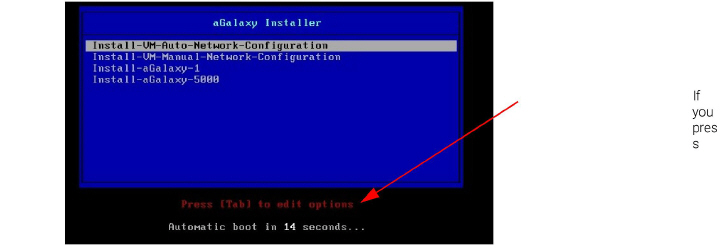
• If installing on VMware, (with DHCP) select Install–VM-Auto-Network-Configuration
• If installing on VMware, (without DHCP) select Install–VM-Manual Network Configuration
• If installing on legacy hardware, select Install–aGalaxy–1
• If installing on new hardware, select Install–aGalaxy–5000
NOTE: By default, eth0 is selected as the primary interface.
3. If you wish to have DHCP assign the management IP, netmask, default gateway, and DNS (name server), you can simply let the installer proceed on its own. The installer will find the DHCP on your network (if one is available), and the values will be automatically assigned.
FIGURE 29 DHCP Installation progress bar

If you do not have a DHCP server in your networking environment, or even if you have a DHCP server but you wish to manually assign the IP, netmask, and gateway, press <Enter> when the screen above appears. This will interrupt the installation process, and you will see a series of additional screens allowing you to manually configure basic settings.
4. After the installation process is interrupted, a window confirming that the install has stopped is displayed. Press <Enter> to continue.
FIGURE 30 Interrupting the installation to manually configure a static IP and other network values

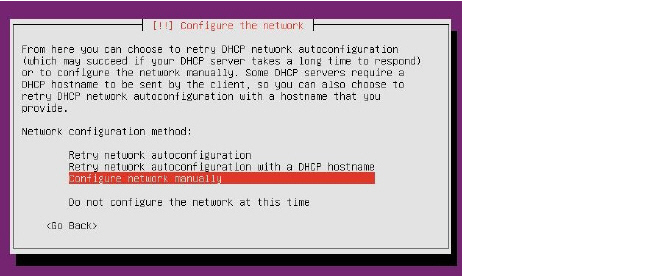
5. Select Configure network manually and press <Enter>.
FIGURE 31 Network configuration methods
6. Enter the desired management IP, and press <Enter>.
FIGURE 32 Configure basic network settings (management IP)

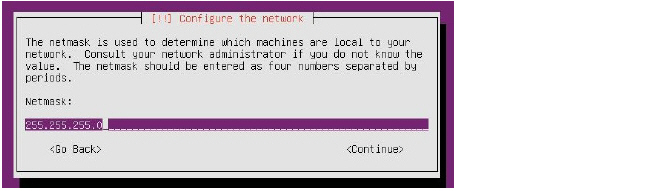
7. Enter the desired network mask, and press <Enter>.
FIGURE 33 Configure basic network settings (netmask)
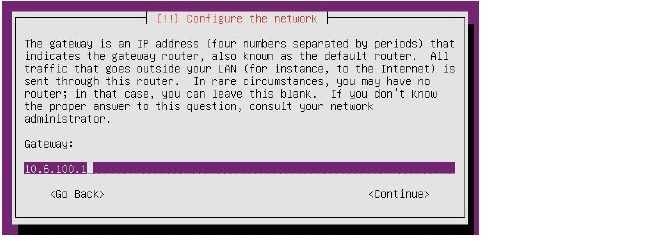
8. Enter the default gateway, and press <Enter>.
FIGURE 34 Configure basic network settings (Gateway)
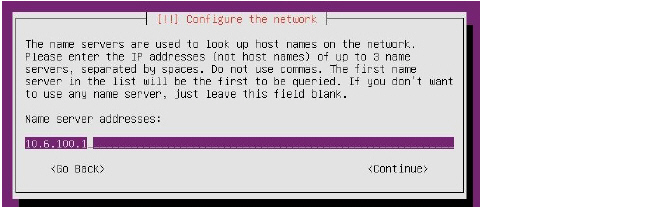
9. Enter the IP address for the DNS server, and press <Enter>.
FIGURE 35 Configure basic network settings (Name server addresses)
Upon completion of these network configuration screens, the software installation will proceed, and then the CLI login screen appears when the loading of the packages has completed.
10.Please wait an additional 15 minutes for various scripts to be loaded as part of the software installation process. The exact time required depends on the hardware configuration. Once all services are enabled, you can access the GUI.
Logging In as “consoleadmin” and Configuring Basic Networks Settings
If you have powered on the device and it has finished booting, log into the device as “consoleadmin”. From here, you can access the menu to configure the management interface (eth0) and other basic network settings.
1. Once the aGalaxy device has finished booting, log into the aGalaxy console with the following credentials:
• user: consoleadmin
• password: a10
2. The aGalaxy console menu appears. From here you can verify the network configurations.
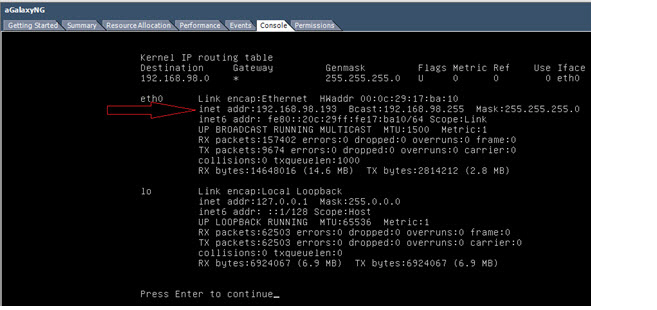
3. Select option <6> Show network to view the IP address of the aGalaxy management port.
FIGURE 36 Output shows the IP address assigned to management port
4. After verifying the network settings, press Enter to proceed. From the menu that appears, you can choose menu option <7> Setup Network if you wish to change any of the network values to match your environment.
If you want to manually edit the network settings, select one of your options below and press Enter:
1. Host name
2. Network Interfaces
3. Default Gateway
4. DNS Server
0. Exit
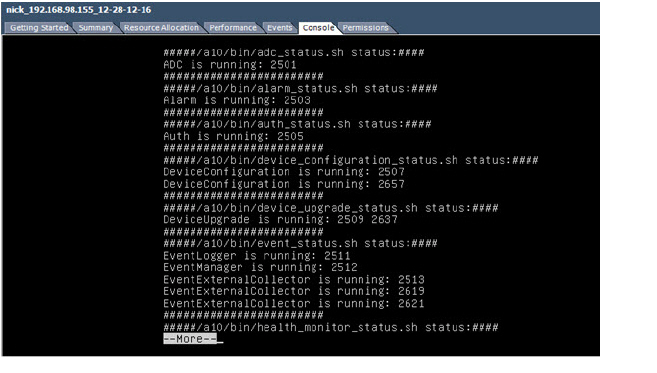
5. Next, confirm that aGalaxy is accessible by selecting option <5> Show services status from the console menu to view a list of services that are running.
The output will indicate whether the aGalaxy related services are up or down.
FIGURE 37 Confirming whether services are up or down
For example, if you want to change the IP address of your aGalaxy server, choose <2> Network Interfaces and then press Enter:
FIGURE 38 (Sample) Using the console menu to change the management IP address of the aGalaxy device
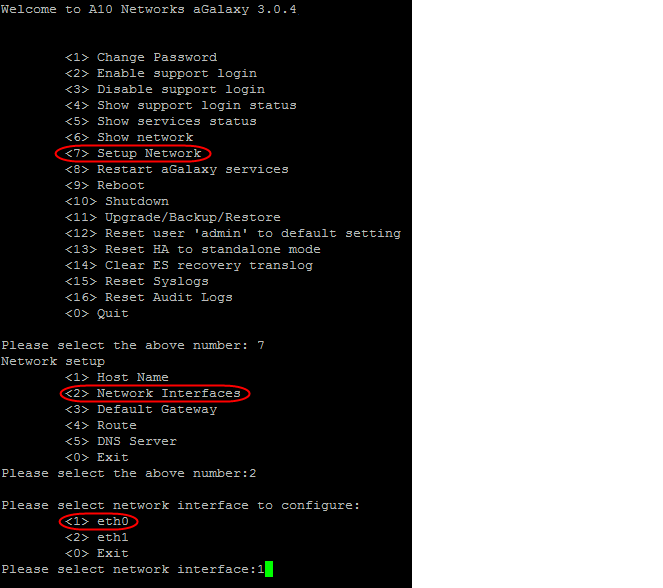
(Optional) Select network interface to configure, press <1> and ENTER:
• <1> eth0
• <2> eth1
• <0> Exit
FIGURE 39 Select network interface to configure
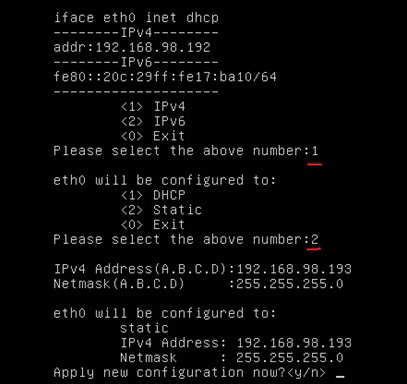
The current IP address is shown. For IPv4 addressing, press <1> and press Enter. The following appears:
Eth0 will be configured to:
<1> DHCP
<2> Static
In the example, to manually assign an IP of “192.168.98.193” and netmask “255.255.255.0”, you can choose menu option <2> and then enter the necessary values. Then, type <y> and press Enter to confirm.
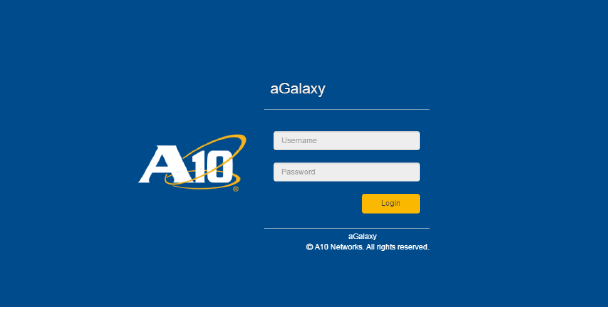
6. To verify your configurations, you can check the aGalaxy network settings by launching an Internet browser and entering the IP address you assigned to the management interface.
Use the following credentials to log into the aGalaxy Web GUI:
• User: admin
• Password: a10
FIGURE 40 aGalaxy login page
7. When you log into aGalaxy for the first time, you will be redirected to the 'Getting Started' page.
The Getting Started page is a wizard that walks you through configuration of basic device settings, such as configuring the IPv4 or IPv6 address, adding an NTP server, setting the system clock, choosing a timezone, as well as setting up the list of device IPs to be discovered.
FIGURE 41 Getting Started page
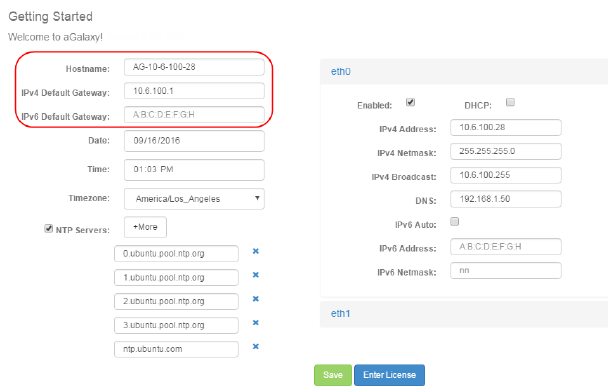
Optional configuration:
• Enter the Hostname and default gateway (IPv4 or v6).
• Configure the NTP servers.
• On the Eth0 settings on the right side of the window, you can manually change the IPv4 or IPv6 IP address, and the netmask, or specify that DHCP should be used from now on.
8. Click Save to save your initial network configurations, and then click Enter License to license your device.
NOTE: You can later update these basic network configurations by navigating as follows from the top menu: System >> Settings and clicking on the General tab. Starting with aGalaxy 3.2.2, navigate to Administration >> Settings >> Network.
Entering the License to Activate aGalaxy
FIGURE 42 Initial License Screen
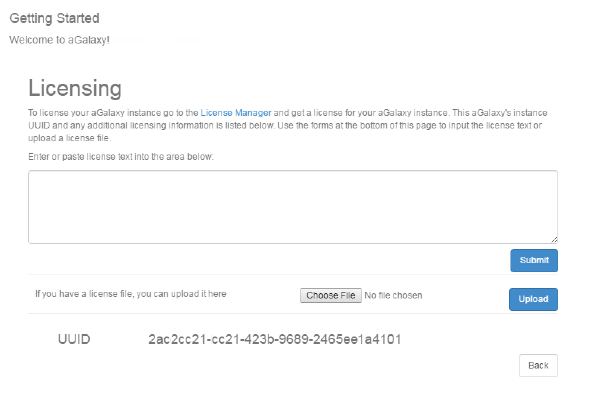
9. Next, before you can use the aGalaxy system, an activation device management license must be installed to enable the software. Optionally, a TPS management add-on license can also be installed afterwards for advanced TPS management features for aGalaxy DM model.
10.Go to the License Manager at the following URL:
https://glm.a10networks.com/
If not already available, create your account on A10 Networks’ Global License Manager (GLM), then sign in.
Note: See the Global License Manager Guide for additional GLM features.
11.After you log in successfully to GLM, the Licenses page provides information on all available appliances that can be activated.
12.Click the appliance you wish to activate and a License Overview page detailing this appliance is displayed.
13.On this License Overview page, click the Activations tab, and then click the Activate an Appliance button.
14.Copy the UUID, which appears at the bottom of the aGalaxy Licensing window. (See FIGURE 42 .)
Note: Be careful to avoid selecting any extra spaces when copying the UUID.
15.Paste the UUID text into the Global License Manager Activate Appliance page in the Appliance UUID field. The license manager will generate your license token.
16.Return to aGalaxy’s License page (Administration >> System and click the Licensing tab) and enter the license using one of the following methods:
• Copy/Paste – Copy the text of the license (created by the License Manager) and paste it into the blank field.
Then, click Submit.
• Upload text file – If you saved the license as a text file, you can upload the text file by clicking the Browse button, navigating to the text file, and then clicking the Upload button. Then, click Submit.
You can now begin using the aGalaxy device to manage your A10 Networks devices.
The base license for aGalaxy enables device management functions such as inventorying ACOS devices, performing device upgrades, and backup and restoration of configuration files to devices such as startup configuration, SSL certificates, aFlex rules, WAF policies, black and white lists, and class lists.
Starting with release 3.2.2, aGalaxy provides enhanced Threat Protection System (TPS) management capabilities, and allows for centralized management of TPS devices using ACOS 3.2.2-P1. aGalaxy 3.2.2 does not offer ADC management capabilities.
17.Repeat steps 6-9 to update aGalaxy with an add-on TPS license.
NOTE: For more information about how to make general configurations on aGalaxy, see the aGalaxy Configuration Guide.