Single Node Installation with Single Interface
| NOTE: | The single node with the single Interface deployment is only for the trial purpose where separate networks are not possible for management and metric traffic. This deployment is not recommended for production use. |
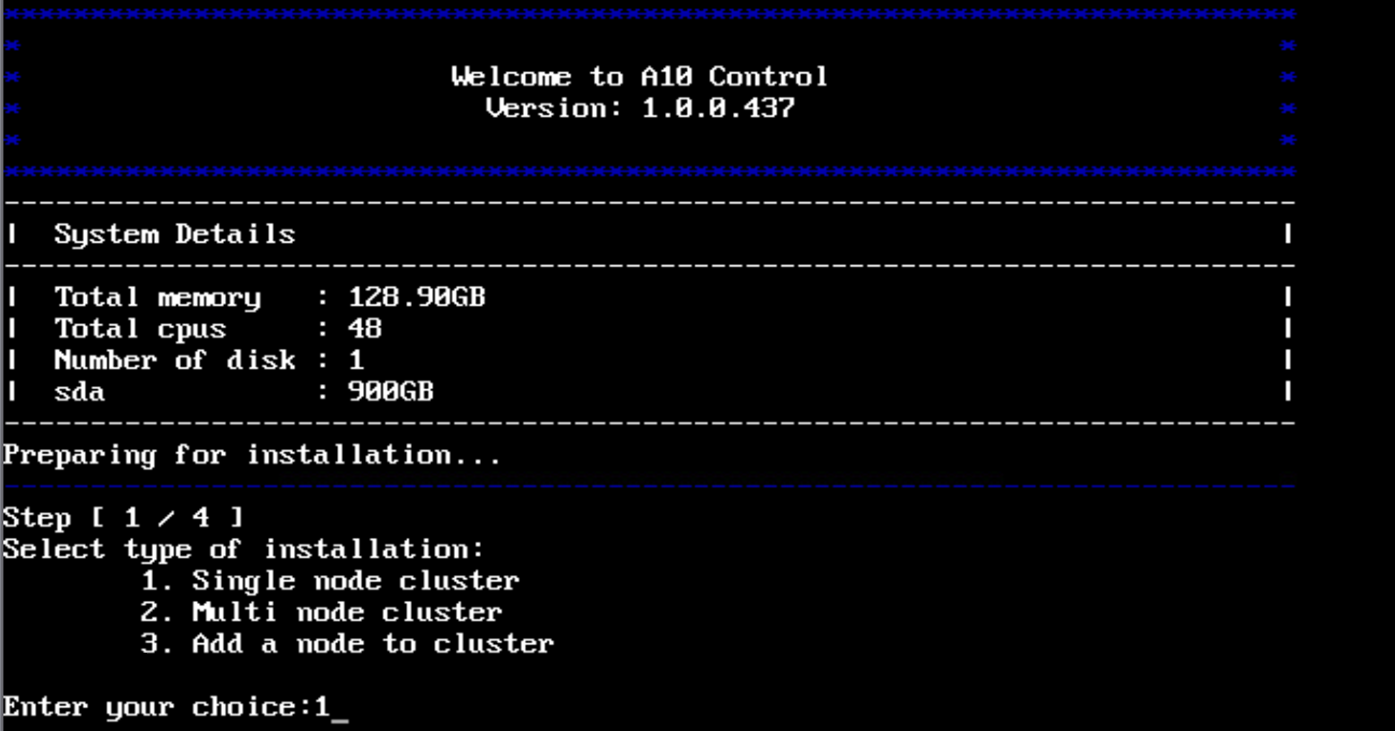
To install the A10 Control software in a single-node cluster with single interface:
-
Select type of installation:

1. Single node cluster2. Multi node cluster
3. Add a node to cluster
-
In
Enter Your Choice, type1to select the single node cluster option and press Enter.The Installation Type: single node cluster is selected is displayed.
- In
Do you want to continue [yes|no]: typeyesto continue. -
In
Enter Your Choice, type1to select interface and pressEnter. -
Configure the network settings for the selected interface
(ens34 - 00:0c:29:4d:35:34):1. Static IP address2. DHCP (Dynamic Host Configuration Protocol)
-
In
Enter Your Choice, type1to selectStatic IP addressand press Enter.Configure these options
IPv4 address,Netmask,Gateway, andName Server(optional), and then press Enter as shown in Figure 14.Figure 14 : Configure Cluster IP

-
In
Do you want to continue with this configuration [yes|no]: typeyesand press Enter.Configuration Summary is displayed for verification.
Figure 15 : Configuration Summary

If you want to modify the configuration, type
noand reconfigure.Else, type
yesto continue with deployment. The deployment process may take around two hours to complete.After the deployment is complete, the console prompts for the
Loginuse the management IP xx.xx.xx.xx to login. For information, see Default Login.