System Management
Navigate to System to manage the A10 Control components.
Figure 39 : System
The System module in A10 Control allows controller or super-admin to manage the following:
The system configurations can be configured through dashboard or APIs.
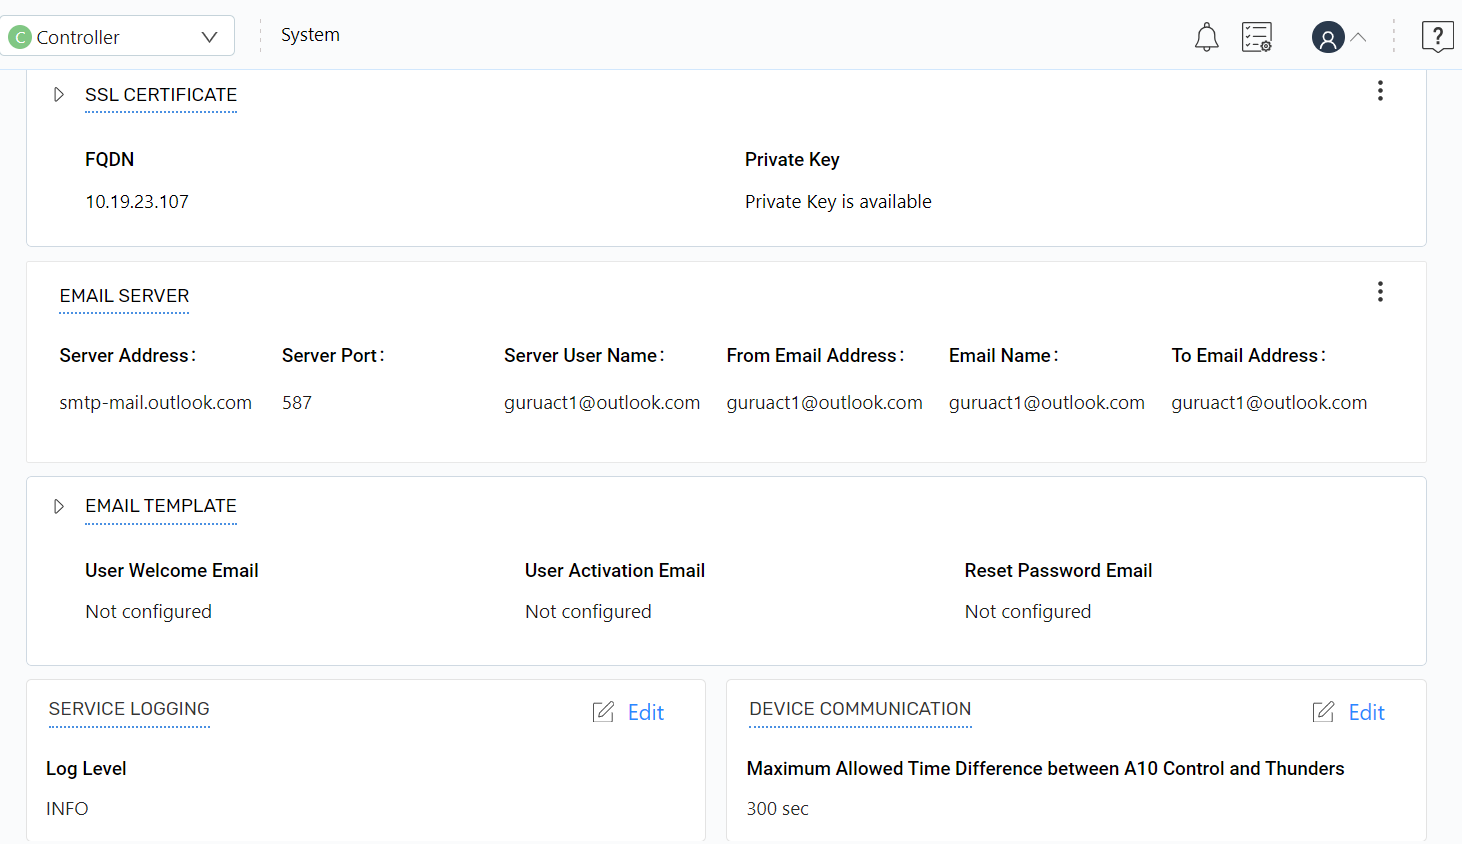
SSL Certificate
Navigate to System to manage SSL certificate:
Figure 40 : System

On the System page, expand the SSL Certificate section to view the server certificate and Certificate Authority (CA) certificate details.
Click the Kebab menu to perform the following:
- Add or Edit SSL Certificates: Click Edit to edit certificates.
- Reset Default: Click Reset Default to reset the default certificates.
Add or Edit SSL Certificates
To add or edit an SSL certificate schema for portal server (UI):
- Navigate to System.
- On the System page, under SSL Certificate section, click the Kebab menu, and then click Edit.
-
On the Edit Certificates page, you can update the following:
Table 10 : Edit Certificates Field
Description
FQDN
The service name and zone name, in combination, comprise a Fully-Qualified Domain Name (FQDN). For example, the combination of zone name “example.com” and the service name “www” becomes FQDN “www.example.com”.
Server Certificate
The server certificate.
CA Certificate Chain
The certificate authority chain to validate the entities.
Private Key
The private key to secure communication.
Specify up to 1-31 characters.
Validate Certificate
The certificate is valid or not.
-
Click Save.
Email Server
Navigate to System > Email Server to manage email server:
Figure 41 : System

Whenever a new user is added to the system, A10 Networks sends a user welcome email and an activation email with all user credentials or a password reset emails to the existing customers. The dashboard offers options to configure the content of the email.
Under the Email Server section, click the Kebab menu to perform the following:
- Add or Edit Email Server: Click Edit to edit an email server configurations.
- Send Test Mail: Click Send Test Mail to send a test mail.
- Reset Config: Click Reset Config to reset the email server configurations.
Add or Edit Email Server
To edit an email server configuration:
- Navigate to System.
- On the System page, under Email Server section, click the Kebab menu, and then click Edit.
-
On the Edit Email Server Configuration page, you can update the following:
Table 11 : Edit Email Server Field
Description
Server Address
The IP address or fully-qualified domain name of an email server using Simple Message Transfer Protocol.
Server Port
The protocol port from which email messages sent to the SMTP server.
Server User Name
The server username to access the SMTP server.
Server Password
The server password to access the SMTP server.
From Email Address
The email address from which an email is sent.
Email Name
An email name to identify.
To Email Address
The email address to receive email.
-
Click Save.
- (Optional) Click Send Test Mail to send a test mail.
Email Template
The email template allows to manage email templates such as User Welcome email, User Activation email, and Reset Password email.
Navigate to System > Email Template to manage email templates.
Figure 42 : Email Template
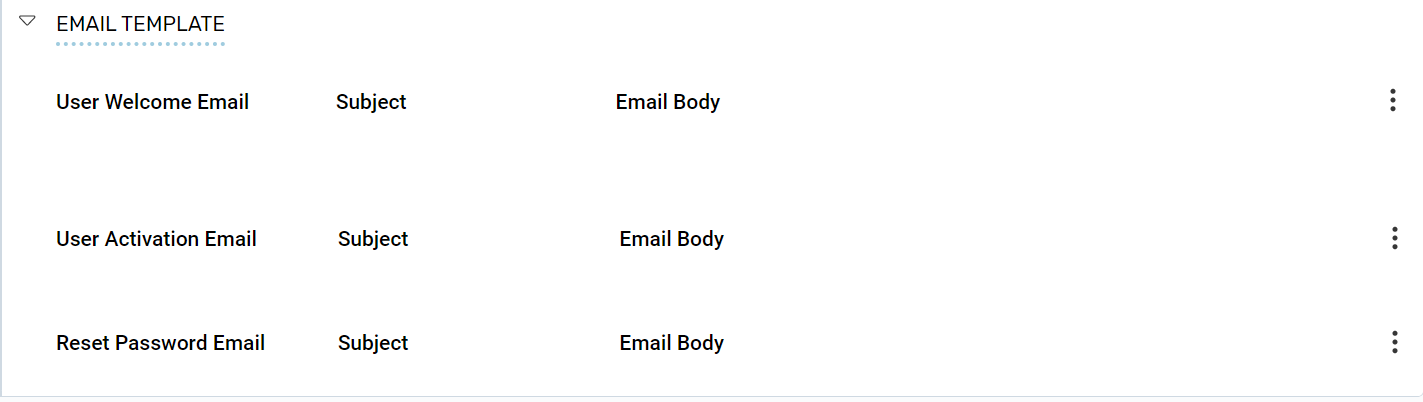
Under the Email Template section, expand the Email Template section, to perform the following:
- User Welcome Email: Under the User Welcome Email section, click the Kebab menu to perform the following:
- Edit a User Welcome Email: Click Edit to edit user welcome details.
- Reset Config: Click Reset Config to reset the user welcome details.
- User Activation Email: Under the User Activation Email section, click the Kebab menu to perform the following:
- Edit a User Activation Email: Click Edit to edit user activation email details.
- Reset Config: Click Reset Config to reset the user activation email details.
- Reset Password Email: Under the Reset Password Email section, click the Kebab menu to perform the following:
- Edit a Password Email: Click Edit to edit or reset password email details.
- Reset Config: Click Reset Config to reset the user password email details.
Service Logging
The Service Logging page allows to configure the log options at three levels such as INFO, DEBUG, and ERROR. The logs can be downloaded and collected from the Microservice logs page (Troubleshooting > Microservice logs) for troubleshooting encountered issues. Irrespective of the level the collected logs include all information about microservices.
Navigate to System > Service Logging to configure the log options.
Figure 43 : Service Logging
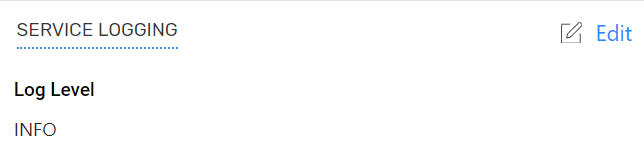
On the Service Logging section, you can perform the following:
- Edit: Click Edit, on the Edit Logging Configuration page, in the Log Level field, select the required log option INFO, DEBUG, or ERROR, and then click Save to save the changes.
Device Communication
For real-time monitoring of analytics, the time between a Thunder device and the A10 Control must be synchronized. The Device Communication page allows to configure the maximum time difference between 90 - 900 seconds.
Navigate to System > Device Communication to configure the time between a Thunder device and the A10 Control.
Figure 44 : Device Communication
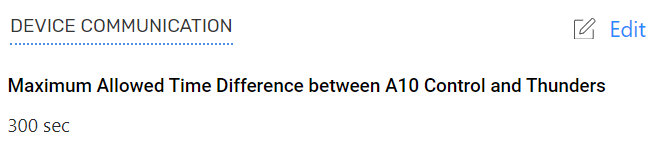
On the Device Communication section, you can perform the following:
- Edit: Click Edit, on the Edit Device Communication Configuration page, in the Time Difference field, enter the required time in seconds, and then click Save to save the changes.