Server Load Balancer on Backend Autoscale
This template configures vThunder instance as a Server Load Balancer (SLB) to automate the scaling process allowing dynamic adjustment of servers based on the workload.
To configure vThunder as an SLB on Backend Autoscale, perform the following steps:
Before creating an automation account, configure the corresponding parameters in the
To configure the parameters, perform the following steps:
-
Download A10-vThunder_ADC-CONFIGURATION > CONFIG-SLB_ON_BACKEND-AUTOSCALE template from GitHub.
-
From Start menu, open PowerShell and navigate to this downloaded folder and open the CREATE_AUTOMATION_ACCOUNT_PARAM.json with a text editor.
NOTE: Each parameter has a default value mentioned in the parameter file which can be modified as required. -
Configure the following parameters:
Table 10 : JSON Parameters Resource Name
Description
Automation Account
Specify the automation account name.
If the automation account does not exist, then a new automation account gets created inside resource group. If automation account already exists, then template gets auto-updated.
If the automation account variable does not exist, then a new automation account variable gets created inside the automation account. If an automation account variable already exists, an error "The variable already exists" is prompted.
"automationAccountName": "vth-amt-acc",Location
Specify the location.
"location": "South Central US",
Client Secret Specify the client secret, application ID, and tenant ID.
To get these values, go to Home > Azure services > Azure Active Directory > App Registration > Owned applications > <application_name>.
  "clientSecret": "9-xxx~jIxxxEVyxxxxHNxxxOwv_xxxxZLxxxTM",
  "appId": "10724xxx-xxx-xxxx-xxxx-xxxx2c14726d",
  "tenantId": "91d27xxx-xxxx-xxxx-xxxx-xxxxf81fcb2f",
Application ID Tenant ID VMSS Specify the server VMSS name.
"vmssName": "vth-server-vmss",
Management Interfaces Specify a unique network interface card for management traffic.
  "mgmtInterface1": "vth-inst1-mgmt-nic",
  "mgmtInterface2": "vth-inst2-mgmt-nic",
vThunder instances Specify the virtual machine names.
  "vThunderName1": "vth-inst1",
  "vThunderName2": "vth-inst2",
Resource Group Specify the resource group where virtual machine scale set having vThunder servers and resources created by the
"resourceGroupName": "vth-rg1",
Virtual Resource Group Specify the name of an existing resource group under which the virtual network is already created.
"vnetresourceGroupName" : "<existing virtual network resource group name>",
vThunder Username Specify a 'Read/Write/HM' privilege username.
"vThUsername": "admin",
Port List Specify port details.
"portList":{ "value": [ { "port-number": 53, "protocol": "udp", "health-check-disable":1 }, { "port-number": 80, "protocol": "tcp", "health-check-disable":1 }, { "port-number": 443, "protocol": "tcp", "health-check-disable":1 } ] } - Verify if all the configurations in the CREATE_AUTOMATION_ACCOUNT_PARAM.json file are correct and then save the changes.
-
Run the following command to create an automation account:
PS C:\Users\TestUser\Templates> .\CREATE_AUTOMATION_ACCOUNT_1.ps1
To verify the creation of an automation account, perform the following steps:
- From Home, navigate to Azure services > Resource Group ><resource_group_name>.
The selected resource group - Overview window is displayed. - Under Resources tab, group the resources based on the resource type.
- Verify if the recently created automation account is listed under Automation Accounts type.
- Select the recently created automation account.
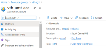
The selected automation account - Overview window is displayed.Figure 181 : Selected automation account - Overview window
- Click Variables from the left Shared Resources panel.
The selected automation account - Variables window is displayed.Figure 182 : Selected automation account - Variables window
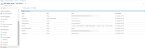
- Verify if all the variables associated with the automation account are listed.


To change the Backend Autoscale vThunder instance password for the first-time, perform the following steps:
- From Start menu, open PowerShell and navigate to A10-vThunder_ADC-CONFIGURATION > CONFIG-SLB_ON_BACKEND-AUTOSCALE template.
-
Run the following command to change the password:
PS C:\Users\TestUser\Templates> .\CHANGE_PASSWORD_2.ps1NOTE: It is highly recommended to change the default password provided by the A10 Networks Support when you log in the vThunder instance for the first time. -
Provide the default and new password when prompted:
Enter New Password:*********
Confirm New Password:*********
The default password is provided by the A10 Networks Support. The new password should follow the Default password policy. For more information, see Default Password Policy.
- Go to Azure services > Resource Group > <vmss_resource_group_name> > <automation_account> > Variables.
-
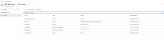
Verify if the timestamp in the Last modified column of the vThPassword variable is updated.
Figure 183 : Updated Variables window

To change the Backend Autoscale vThunder password subsequently, perform the following steps:
- Go to Azure services > Resource Group > <vmss_resource_group_name> > <automation_account> > Variables.
- Update the password in the vThPassword variable manually and save the changes.
The password gets encrypted.
To configure vThunder as an SLB on-demand, perform the following steps:
- From Start menu, open PowerShell and navigate to A10-vThunder_ADC-CONFIGURATION > CONFIG-SLB_ON_BACKEND-AUTOSCALE template.
-
Open the SLB_CONFIG_ONDEMAND_PARAM.json with a text editor.
NOTE: Each parameter has a default value mentioned in the parameter file. -
Configure the following parameters:
Table 11 : JSON Parameters Resource Name
Description
Service Group List
Specify the service group details.
"serviceGroupList": {
          "value": [
              {
                "name":"sg443",
                "protocol":"tcp",
                "health-check-disable":1
              },
              {
                "name":"sg53",
                "protocol":"udp",
                "health-check-disable":1
              },
                {
                "name":"sg80",
                "protocol":"tcp",
                "health-check-disable":1
              }
            ]
        },
Virtual Server
Specify the virtual server details.
The virtual server default name is “vip”. The vip address is generated dynamically after deploying the vThunder instances. Thereafter, its default value under
virtualServerListshould be replaced, see Get VIP address ."virtualServerList": { "virtual-server-name": "vip", "ip-address": "10.0.2.5", "metadata": { "description": "virtual server is using VIP from ethernet 1 subnet" }, "value": [ { "port-number":53, "protocol":"udp", "ha-conn-mirror":1, "auto":1, "service-group":"sg53" }, { "port-number":80, "protocol":"http", "auto":1, "service-group":"sg80" }, { "port-number":443, "protocol":"https", "auto":1, "service-group":"sg443" } ] } Get VIP address
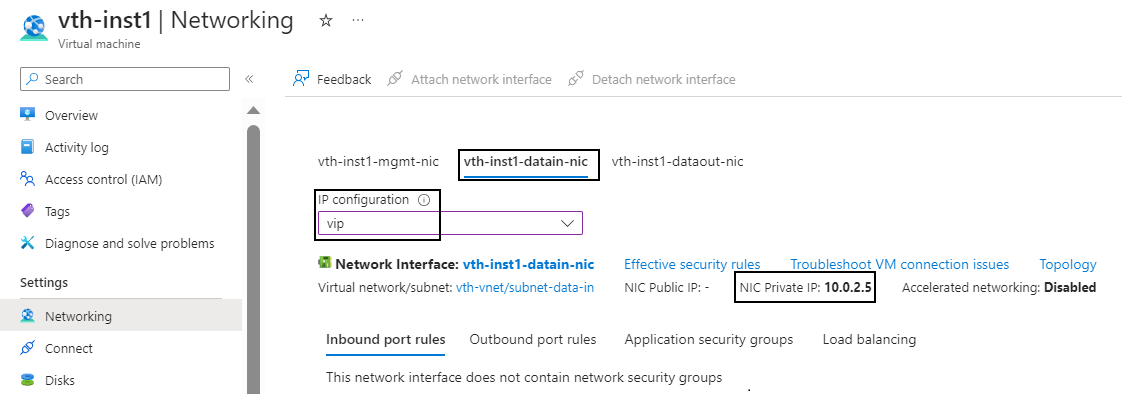
To get the vip address after deploying the vThunder instances, perform the following steps:
- From Home, navigate to Azure services > Resource Group > <resource_group_name>.
- Go to the first vThunder instance. Here, the first vThunder instance is
vth-inst1. - Select Networking from the left Settings panel.
- Select the Datain NIC tab > IP configuration >
vip.
Here, Datain NIC isvth-inst1-datain-nic.Figure 184 : Virtual machine - Networking window - Datain NIC tab
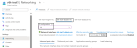
- Select the NIC Private IP.
- Replace the
ip-addressvalue undervirtualServerListwith thisvip."virtualServerList": { "virtual-server-name": "vip", "ip-address": "10.0.2.5", "metadata": { "description": "virtual server is using VIP from ethernet 1 subnet" },
NOTE: ha-conn-mirrordoes not work on port 80 and 443. - Verify if the vip address and all other configurations in the SLB_CONFIG_ONDEMAND_PARAM.json file are correct and then save the changes.
-
Run the following command to configure vThunder instance as an SLB:
PS C:\Users\TestUser\A10-vThunder_ADC-CONFIGURATION\BASIC-SLB> .\SLB_CONFIG_ONDEMAND_3.ps1 -
Provide the correct vThunder instance password when prompted:
Enter New Password:*********
-
If the SLB is configured successfully, the following message is displayed:
SLB Server Host IP: 10.0.3.7
Virtual Server Name: vip
Resource Group Name: vth-rg1
vThunder1 Public IP: 13.85.81.137
vThunder2 Public IP: 13.85.81.113
Configuring vm: vth-inst1
configured ethernet- 1 ip
configured ethernet- 2 ip
Configured server
Configured service group
0
Configured virtual server
SSL Configured.
Configurations are saved on partition: shared
Configured vThunder Instance 1
Configuring vm: vth-inst2
configured ethernet- 1 ip
configured ethernet- 2 ip
Configured server
Configured service group
0
Configured virtual server
SSL Configured.
Configurations are saved on partition: shared
Configured vThunder Instance 2
To create the SLB-Config runbook, perform the following steps:
- From Home, navigate to Azure services > Automation Accounts > <automation_account_name>.
The selected automation account window is displayed.Figure 185 : Selected automation account window

- Select Runbooks from left Process Automation panel.
The <automation_account_name> - Runbooks window is displayed.Figure 186 : Selected automation account - Runbooks window

- Click Create a runbook.
The Create a runbook window is displayed.Figure 187 : Create a runbook window

- Select or enter the following information:
- Name: SLB-Config
- Runbook type: PowerShell
- Runtime version: 7.1
- Description
- Click Create.
The Edit PowerShell Runbook is displayed.Figure 188 : Edit PowerShell Runbook window
NOTE: It may take the system a few minutes to display the edit window. - From Start menu, open PowerShell and navigate to A10-vThunder_ADC-CONFIGURATION > CONFIG-SLB_ON_BACKEND-AUTOSCALE template.
- Open SLB_SERVER_RUNBOOK.ps1 with a text editor and copy the entire content of the runbook.
- Paste this content in the right panel of the Edit PowerShell Runbook window.
- Click Save and then click Publish.
The runbook gets created for the selected automation account.


To verify that the virtual machine instances are running, perform the following steps:
- From Home, navigate to Azure services > Resource Group > <resource_group_name>.
The selected resource group - Overview window is displayed. - Under Resources tab, group the resources based on the resource type.
- Select the virtual machine scale set instance under Virtual machine scale set type and verify that the instance is in Start mode.
Figure 189 : VMSS window

To create a webhook, perform the following steps:
- From Start menu, open PowerShell and navigate to the folder where you have downloaded the
- Run the following command to create the webhook:
PS C:\Users\TestUser\Templates> .\CREATE_WEBHOOK_4.ps1 -runBookName "<runbook_name>"
Example:
PS C:\Users\TestUser\Templates> .\CREATE_WEBHOOK_4.ps1 -runBookName "SLB-Config"
After the webhook installation is complete, the webhook url is displayed.
Save this URL :
https://fa72c8e5-xxxx-xxxx-9dc5-b4a71eec0a95.webhook.scus.azure-automation.net/webhooks?token=Q*****pG4UEOScfqdEGEAkqJPgdK%2bOpusoUAWk*****%3d
- Save this webhook url for future purpose.
- From Home, navigate to Azure services > Virtual machine scale set > <vmss_name>.
The selected VMSS - Overview window is displayed. Here, the VMSS name isvth-server-vmss. - Click Scaling from the left Settings panel.
The selected VMSS - Scaling window is displayed.Figure 190 : VMSS-Scaling - Notify tab
- Select Notify tab.
- Copy the saved webhook url and paste it in the Webhook field.
- Click Save to save the changes.

To verify the creation of runbook job, perform the following steps:
- From Home, navigate to Azure services > Automation Accounts > <automation_account_name>.
The selected automation account - Overview window is displayed. - Click Jobs from the left Process Automation panel.
The selected automation account - Jobs window is displayed. Here, the job isSLB-Config.Figure 191 : Selected automation account - Jobs window
- Verify if the runbook job has completed status.
- Select the runbook job > All Logs tab to verify the logs.
The selected automation account - selected job - Jobs window is displayed.

Figure 192 : Selected runbook job window
